YouTube captioning for SEO and access
Using video on your site is great for SEO - users are proven to be more engaged with good video content, creating longer visit times, a higher possibility of sharing and, if you're the star, building trust.
Captioning is also important for screen readers, which provide access for differently sighted users.
YouTube is the 2nd largest search engine, so your video strategy must include hosting on YouTube. Here you can optimise video titles, subtitles and description. You can also add accurate video captioning, making your content accessible to users with hearing difficulties, as well as giving users the chance to read your message if they're watching in a noisy environment.
Captioning videos is also great for SEO. Search engines can only crawl text — not images or audio. That’s why having a full, accurate transcript is really valuable for SEO. Don't rely on auto captioning (developed from Auto Speech Recognition) unless you want (sometimes hilarious) jibberish beneath your wonderfully crafted video. They are often inaccurate, but, they are a useful base line from which to edit, as wording is already placed in a logical way that will make them more readable, and easier to time.

To get to the caption area, once your video is uploaded, go to your Video Manager by clicking your account in the top right > Creator Studio > Video Manager > Videos.
Next to the video you want to add captions or subtitles to, click the drop-down menu next to the Edit button.
Select Subtitles and CC.
If automatic captions are available, you'll see Language (Automatic) in the "Published" section to the right of the video.
Changing Auto Captions
If auto captions have been added to your video, you'll see '[Language] (Automatic)' in the "Published" section to the right of the video, when you're in video manager. Captions may take a while to become visible after you upload your video, and may not happen at all if you have a long 'no speech' period at video start, if audio is poor, or speech is heavily accented.
To review automatic captions and make changes:
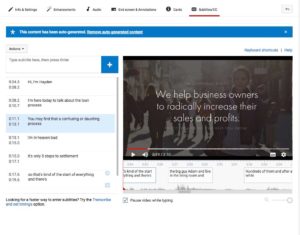
Click on the [Language] (Automatic) field to the right of the video under 'Caption text' - this is where the auto-generated captions are listed with their corresponding timecodes. Each line under 'Caption text' can be edited once a line is selected.
Click on the line you wish to edit and adjust the captions to correct it.
When you have finished editing the captions, click 'Done' on the bottom right corner to save the new version of the captions.
Caption files
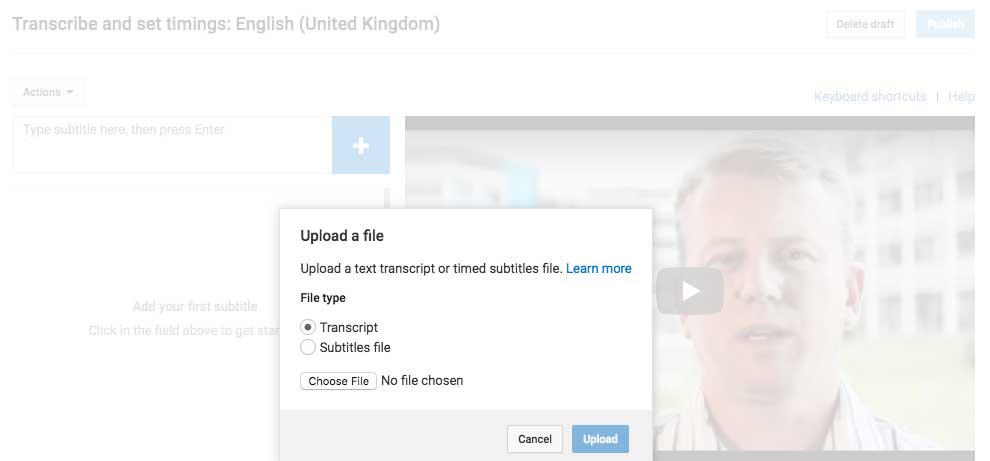
Upload a caption or subtitle file (click here for a description of an srt or subtitling file) or a plain text transcript file for captioning. Adjust time code and breaks accordingly by clicking 'Set timings' to sync your transcript with the video.

Manual Captioning
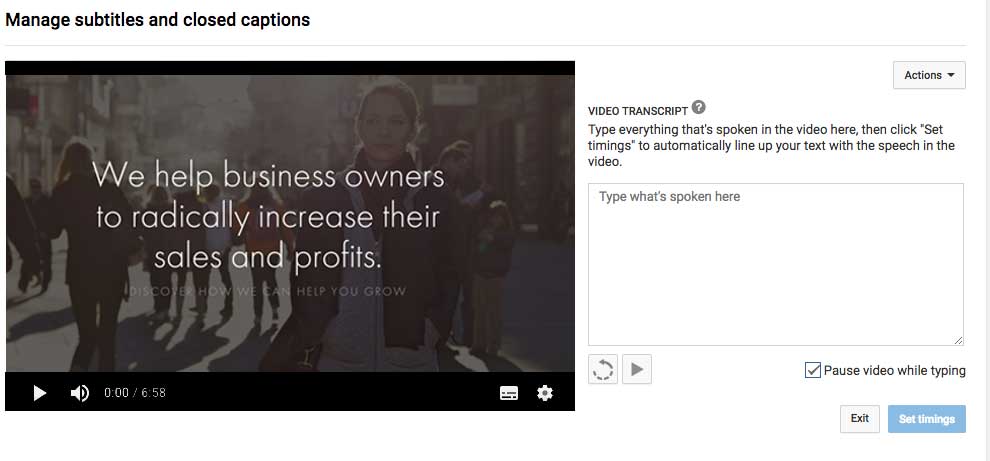
Finally, you can manually fill in the captions as the video plays by choosing the option: transcribe and auto-sync. While you're typing, the video pauses, usefully allowing you to add without clicking on the stop start controls.

 EMAIL
EMAIL CALL
CALL