 EMAIL
EMAIL CALL
CALL
How do I verify my site with Bing?
A step by step guide to verifying your site with the Bing search engine
With discussions about google withdrawing from Australia if not able to reach agreement over payment for news content, it’s time to make sure you’re verified with Bing.
To do this you need to know the login details for your Domain Name hosting – the company where you bought your domain name
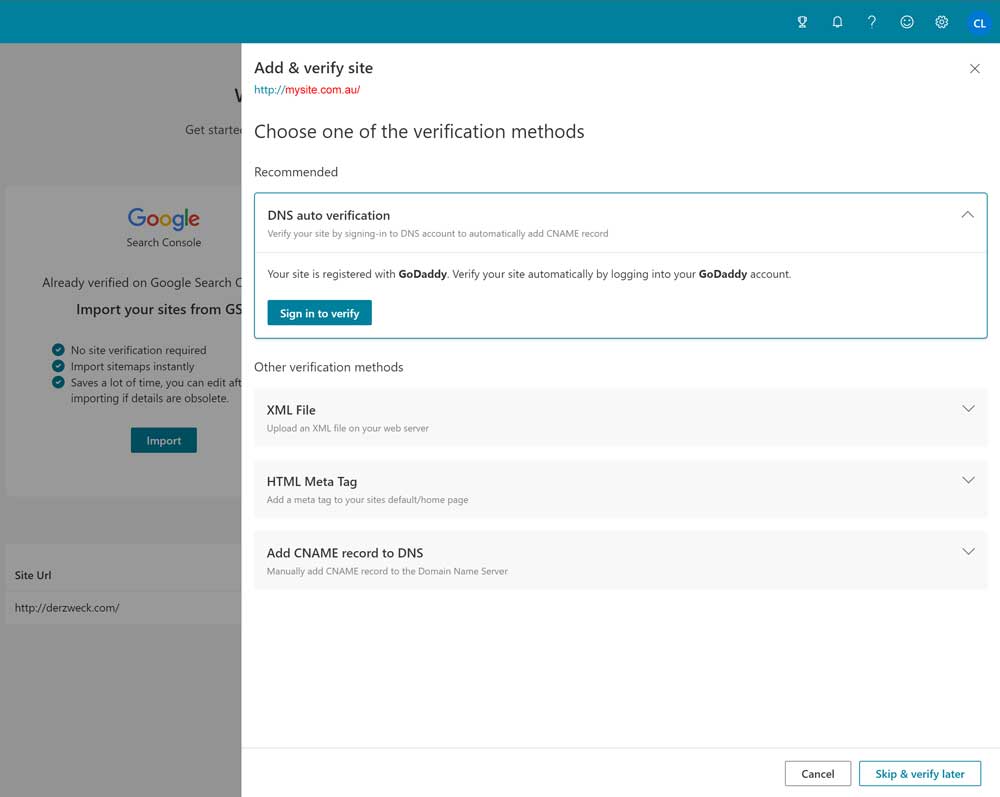
- Open a Bing Webmaster tools account here
- Or, if you have an account, already, sign into your account
- Add the URL of your site
- If your site is already listed in Google search console, you can import it across to Bing
- Once you’ve added a new site, you need to verify it – ie, you need to prove to Bing that you own your site, so you’re not just snooping around a competitors search results.
- Next you’ll be told you need to verify the site and offered a Bing xml file to download.
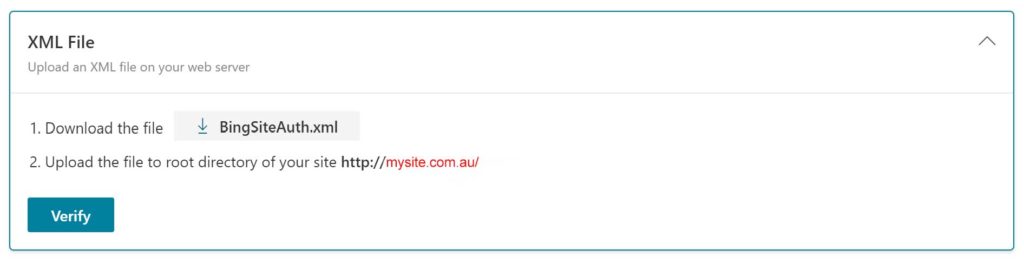
TO VERIFY WITH YOUR BING XML FILE:
You can do this 4 ways:
1. Bing now offers an automatic Domain Name verification service IF your domain name provider allows this. Check with them before you start.
Have your login details for your domain name host (the company where you bought your domain name) ready and when prompted, login to this account. Bing will then route you to add a CNAME file.
2. Upload the xml file into your hosting server via ftp. Ask your hosting support for help with this, or if you know your way around FTP software, upload the xml file into your site’s ‘Root Folder’
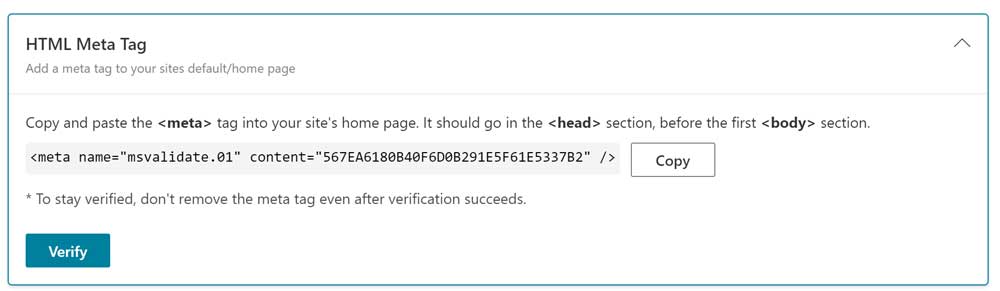
3. Meta tag authentication: Copy the displayed <meta /> tag with your custom ownership verification code to the clipboard. Then open your registered site’s default page in your web development environment editor and paste the code at the end of the <head> section. Make sure the <head> section is followed by a <body> tag. then, upload the revised default page file containing the new <meta /> tag to your site.
4. Add CNAME record to DNS: Login to your hosting account and go to ‘Manage domain name records’ Here you will be able to edit the CNAME record to hold the verification code (series of numbers and letters) you’ve downloaded. Your hosting support can usually help with this. (some hosting support will charge you to do so).
NEXT, VERIFY BACK ON THE BING ACCOUNT PAGE
Once you’ve added the code in any of the above ways, go back to where you downloaded the xml file and hit ‘Verify’ – this is an important final step.
If you need help getting your site verified with Bing, contact me for assistance.
Bing may not seem important, with such a small market share, but ensuring your site is added to Bing can help ensure it’s visible in as many areas as you can.